
First up is a wedding card:

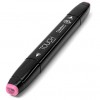
The top panels began as a 4.25x5.5 piece of white cardstock. I then trimmed off a quarter inch and cut the bottom piece at the 1" mark. I set the bottom piece aside and started stamping on the top piece. I stamped the wreath spray first in Flaxen without really worrying about leaving space for flowers. Then I stamped the flowers on top with Pixie and Cotton Candy and used a ShinHan Marker to add yellow flower centers. This was so easy, and it makes a beautiful background.
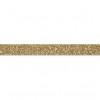
After I stamped the "Happy" in Black, I lined up the top panel with the top of the card base and drew a faint pencil mark on the base as a guide for the Gold Shimmer Trim. Since I'm not steady enough with my hands to cut a perfect piece of shimmer trim then affix it, I leave myself a little room on each end that gets trimmed later. I stamped "WEDDING DAY" in Black on the bottom panel, then foam mounted both the top and bottom panels over the card base leaving room for the shimmer trim to peek through. I few Gold Bling Gems to add a little extra impact, and done!
I was so pleased with how well the Flaxen color coordinates with gold!! Makes me love Flaxen even more.
Next up, an anniversary card:

For this card, I did a similar type of background stamping as the wedding card only I kept my wreath spray image around the edges of the frame shape cut from Artiste. I used the exact same colors except for the sentiment which is in Topiary and added a few Canary and Sunset small flowers, Canary sponging, and a pink ShinHan Marker to touch the centers of the Canary flowers. To fill in any blank space around the flowers, I stamped the triangle of dots from Doodled Designs (also retiring at the end of March) in Flaxen.
If you look carefully under the "Y" in "ANNIVERSARY," you can see where I stamped it on the frame shape. It wasn't straight, so I used a thin piece of cardstock to stamp it again and foam tape mount it over top of the crooked word. There's almost always a way to fix a stamping boo-boo! I hand cut the banner tails on this little piece by eye-balling the center, snipping a tiny center cut, then cutting the V-shape by snipping from the outside edge to the top of my center cut and repeating the process from the other edge.
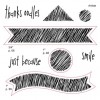
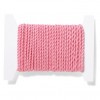
Using Canary ink, I stamped the banner from Oodles of Doodles about 1/3 of the way down from the top of my card base. I cut a piece of Pixie Extra Thick Twine (retiring end of March) about a smidgen smaller the center points of the Canary banner, taped the center to the back of the frame shape, and frayed the edges. Lots of impact for a small piece of twine.
Because I'm cheap, I cut my piece of foam tape to mount the frame shape then cut it again down the center to create two, thin strips that went on either side of the taped Twine, peeled off the backing, and mounted it over top of the Canary banner.
Such a cheerful card for Spring!
Again, three of the stamp sets used on these cards, as well as the Pixie Extra Thick Twine, are being retired to make room for a brand new Seasonal Expressions offering beginning in April.
Until next time,
Becca


Just to let you know, the stamps set dont retire til next year. Just the papers and emblellisments do.
ReplyDeleteThank you for letting me know, Nikka!! That's really, really good news!!
Delete